Here's a video of the inside while on I-89 to Burlington.
This was a solution I used for the back door lock, super simple and easy to instal,
just your basic door deadbolt.


Here's the work area that I used outside of the S.P.A.C.E. Gallery in Burlington, VT
Lots of hours spent cutting boards and plywood...


...while TONS of slugs oozed around on the ground.
My friend Nick and I glued down the 25psi per square inch rigid foam board insulation to the rustoleum-painted metal floor. Then, over that, I glued the 3/4 inch plywood.


Here's the amount of head room that I was just realizing I now have withe the addition of 3 inches of flooring. None.

This is the studio space that I was sharing with my friend Laura. She was amazingly nice and tolerant of my insane amounts of bus junk. Thank you Laura!!!!

Here I am with friends Leah and Callie, cutting and organizing the butternut floorboards that I got from a friends barn-attic. They were gross, old, and smelly from a nice spattering of cat pee, but, again, Laura was incredible and helped me clean all 140ish boards for hours.


Gluing down the boards after being cut to size, then screwing them in place.


Here's the first time I slept in the newly floorboarded bus. I used bubble insulation to block traffic's view of my hiny.


It was fun! That's my foot.

My air mattress and the rest of the boards in the back.


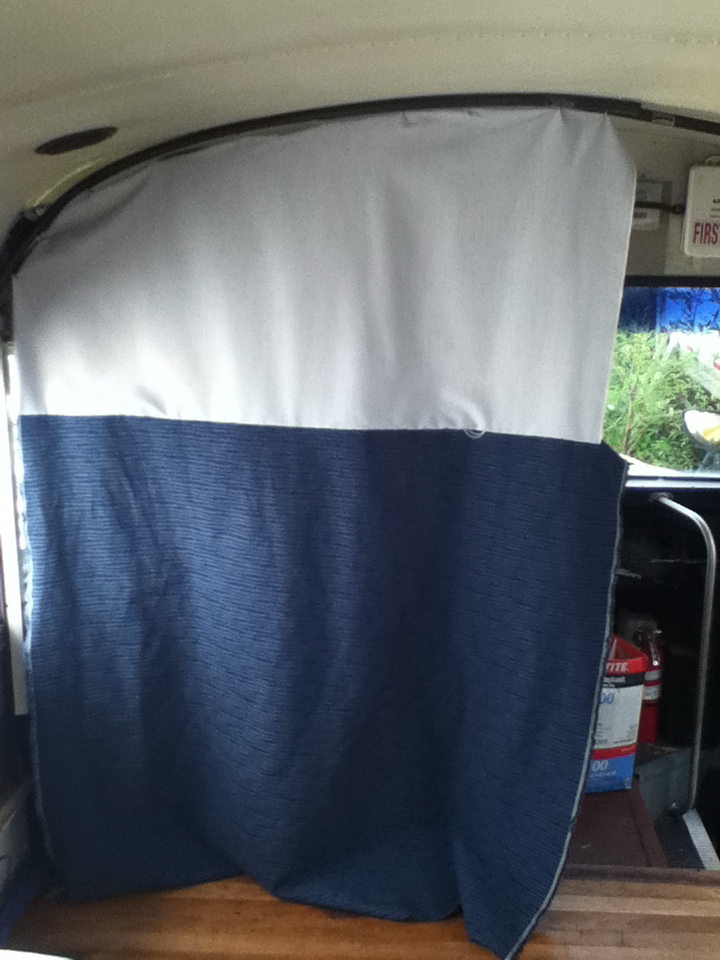
Here's my solution to needing a front curtain, while following the curvature of the ceiling. Split tube, beads, wire, and cloth. It's working so far!


Here's the sander that I ended up using for the majority of the floor. I was using the belt sander in the background...until it lit on fire.

3 hours of sanding.

Me realizing that this was going to take forever.

16 hours later


Wood glue and sawdust makes a wonderful wood filler that I used to plug up the screw holes.

At my friend Karl's suggestion, I used boiled linseed oil to tone the floor. Good one Karl!

I polyurethaned the floor with 4 coats. Unfortunately I used the wrong kind of roller for the last 2 coats and there was tons of fuzzy lintyness all in the top coat. So, waited for it to cure, then I sanded it down and re-applied the poly with the right kind of roller. So much work, but so worth it.

Time to class it up! Amy helped me with picking paint colors and ratios, and Laura helped paint the bus during the week of warm weather we witnessed in late September.

Duke and Mojo, two of the sweetest junkyard dogs you'll ever meet.


I started to move large furniture in once the poly was cured...It's staring to feel like home!

With the perfect advice from my friend Shawn, I started building the loft bed. She and Nick lived in a converted shuttle bus for over a year.

These little burs were EVERYWHERE...all the time.

Cutting boards for bed slats. Thanks college kids!

There's my scooter Riva Mcentire.

I made cardboard basic versions of every major area that I planned to build. This way I was able to tell how much space I'd have, and whether or not I would feel claustrophobic or not.

This is the bathroom mock up.

Here's the real bathroom. The bucket is representative of whatever toilet solution is chosen. So far, it's been public bathrooms, but in case of emergency, I'll need something close to home.

3 attached folding walls temporarily create a large bathroom, or showering space.


Here's the cardboard art desk area.

Tons of plywood and building materials donated to me by my friend Hillary's mom. Thanks! The sink was purchased along with the countertop (hard to see) at Rebuild, the recycled building materials yard on Pine street in Burlington. I couldn't have done it without them!


Installed the sink

I decided the art desk needed storage, the two walls to the right will have 4 shelves
to store lots of my materials.

I boosted the little fainting couch up to provide storage underneath.


Here's the start to the kitchen counter frame.

I installed fire board all around the wood stove, and in the window insert that holds the pipe. Then I added aluminum flashing, then tin spaced an inch off of the wall.


Super toasty!


Here are the first book shelves!


The kitchen. The white things on the ceiling are magnetic spice containers. That's my kitchen stove, a coleman cook stove that works great! 5 bucks at a yard sale. The shelves now have bike tubing to keep the materials from falling off.

No comments:
Post a Comment